# Adding User & Assigning Location to a User
### Adding users
To add a new user , follow the steps given below
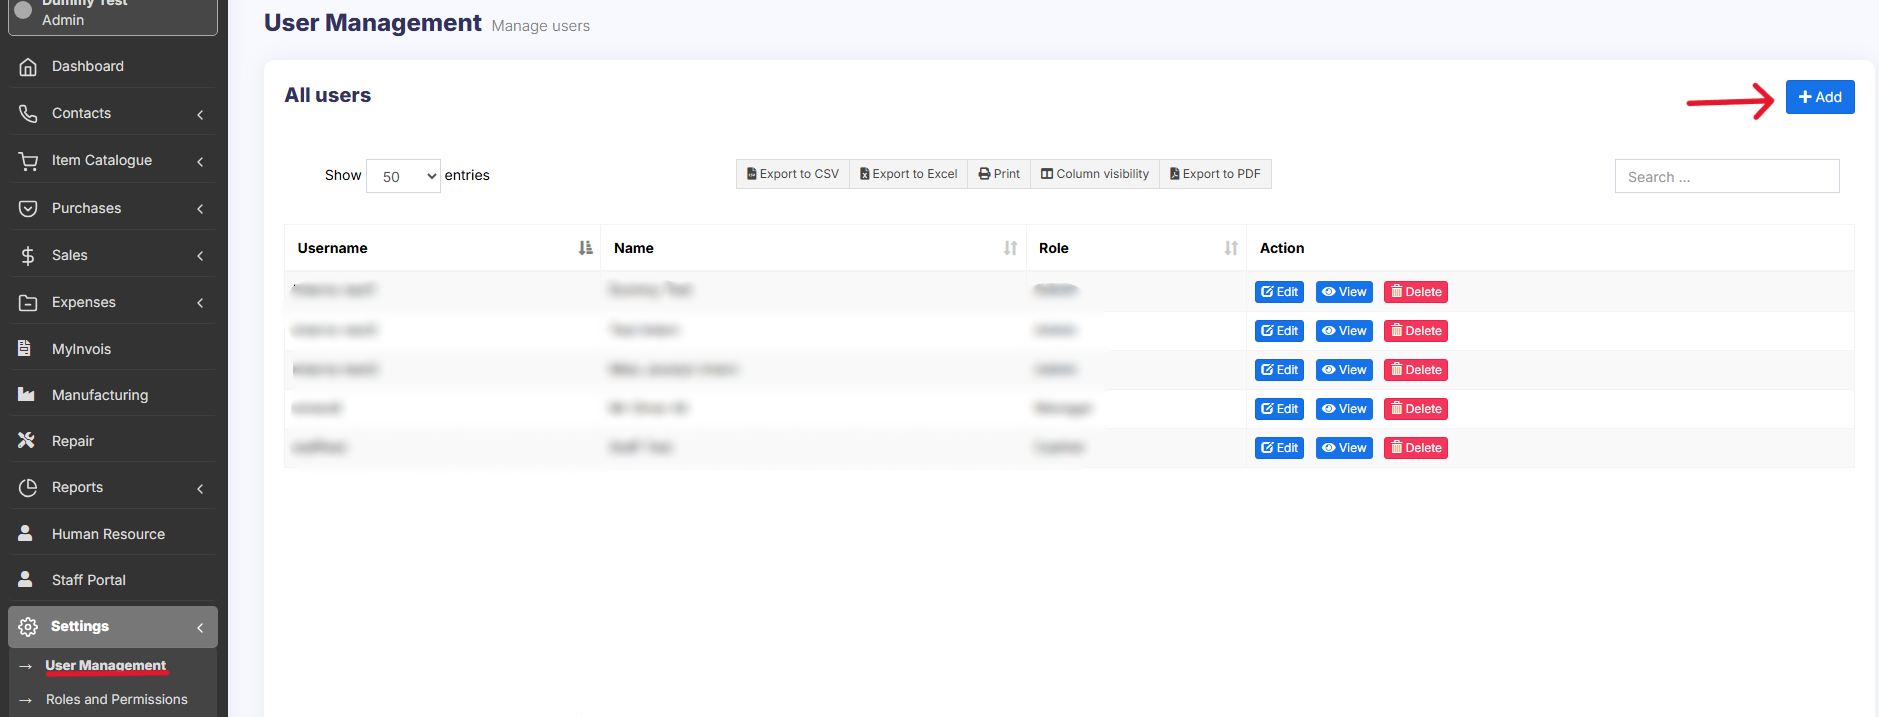
1. Go to **User Management -> Users ->Add New**
[](https://docs.senangurus.com/uploads/images/gallery/2025-10/screenshot-2025-10-06-162450.png)
2. Fill the user details, select user role, give a unique username.
[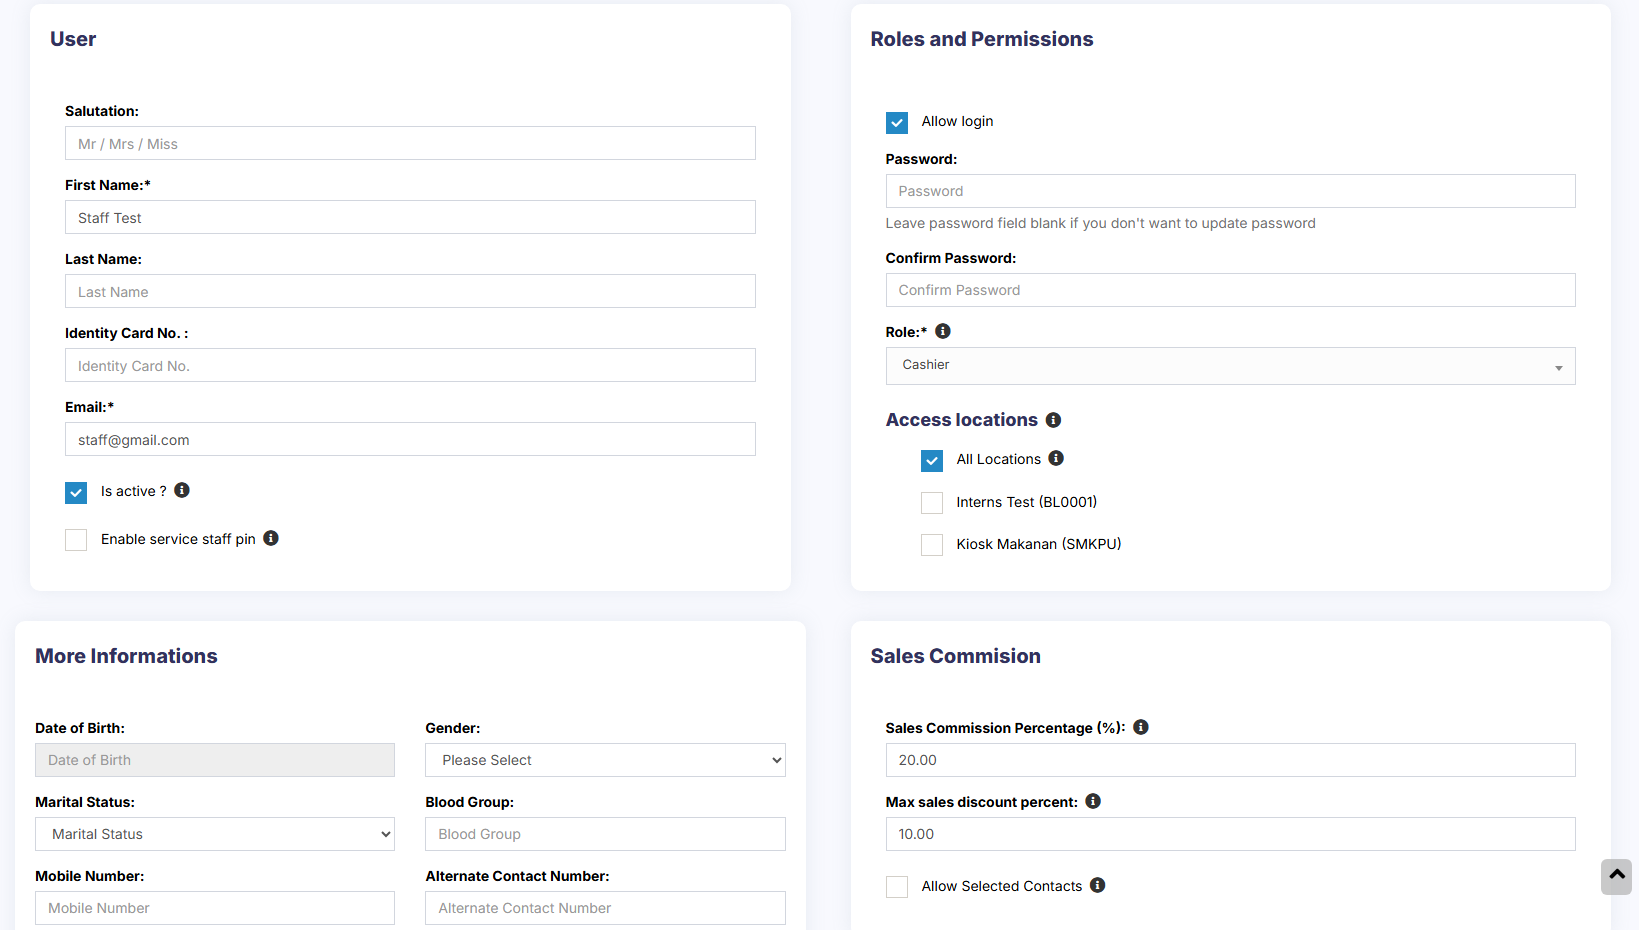](https://docs.senangurus.com/uploads/images/gallery/2025-10/0DCimage.png)
3. **Sales Commission Percentage (%)**: Provide the commission % for this user. This option gets applied if the commission agent feature is enabled. *(Not available in Senangurus-Enterprise)* [](https://docs.senangurus.com/uploads/images/gallery/2025-10/3JGimage.png)
4. **Is active?:** Activate/Deactivate the user.
[](https://docs.senangurus.com/uploads/images/gallery/2025-10/tuUimage.png)
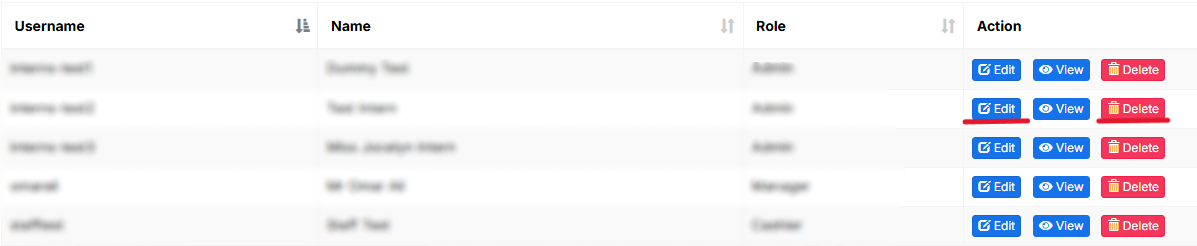
5. You can **Edit**/**Delete** a user.
[](https://docs.senangurus.com/uploads/images/gallery/2025-10/screenshot-2025-10-06-170117.png)
### Assign locations
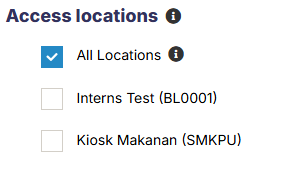
While adding the user, select the locations that the user can access. You can either select all locations or select one or more particular locations.
Refer to the image below:
[](https://docs.senangurus.com/uploads/images/gallery/2025-10/rGFscreenshot-2025-10-06-164847.png)
### Max sales discount
[](https://docs.senangurus.com/uploads/images/gallery/2025-10/xrTimage.png)
The maximum discount that an user can give during sales in the POS & sales screen. If you don’t want to have this restriction then simply keep this value blank.
### Disable login
You can provide login permission for an user or deny it. If you allow user to login, then you have to provide the username and password for that user.
Refer to the image below
[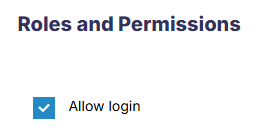](https://docs.senangurus.com/uploads/images/gallery/2025-10/s60image.png)
### Video Demonstration: