User Management
- Adding User & Assigning Location to a User
- Role Management
- Using Commission Agent feature
- Adding superadmin user
Adding User & Assigning Location to a User
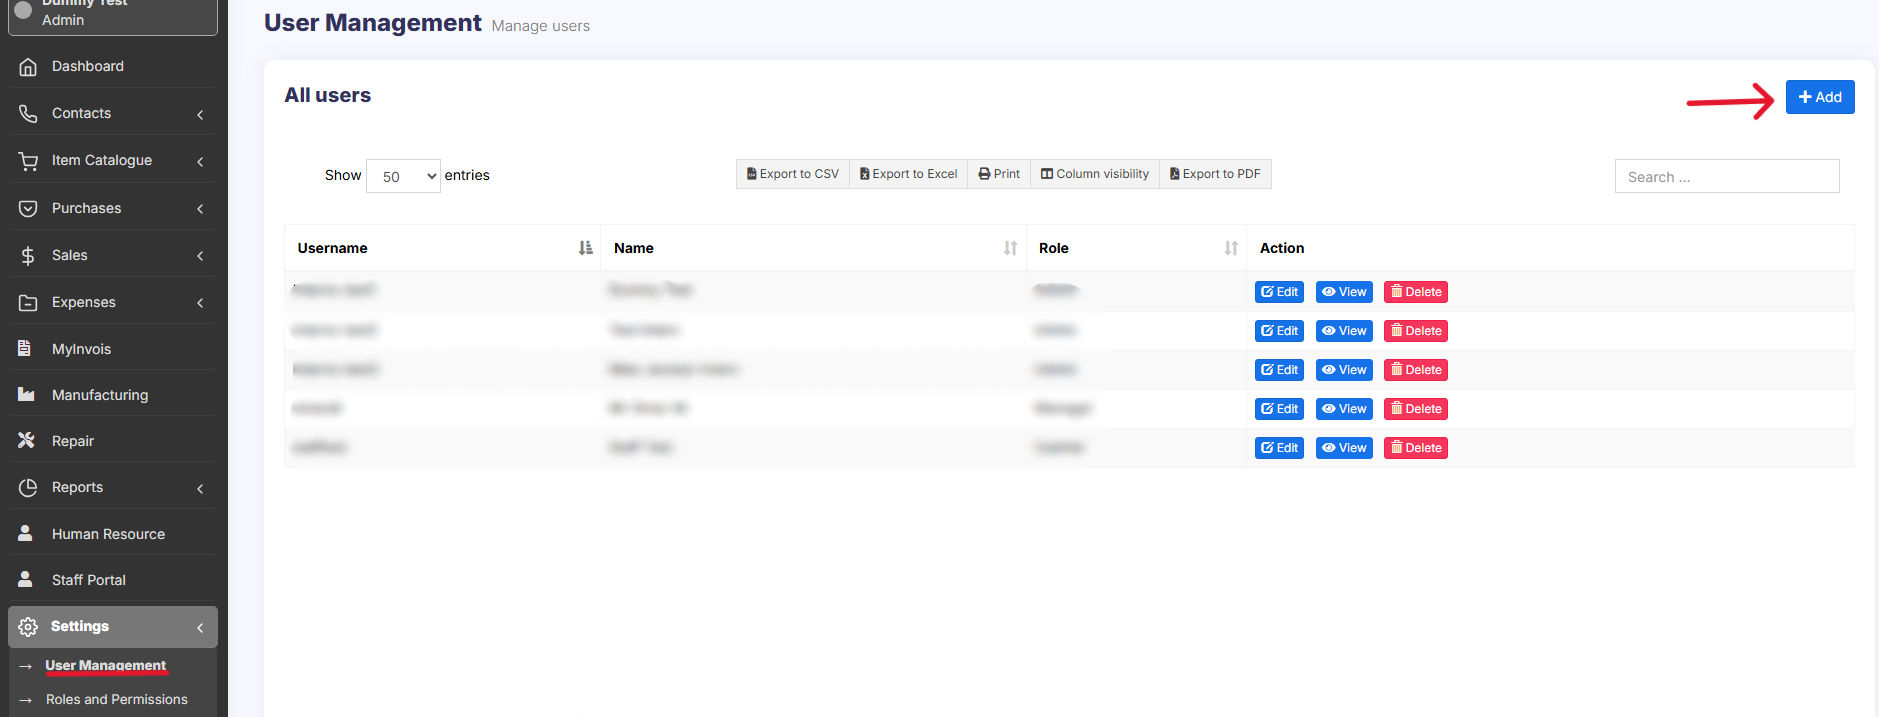
Adding users
To add a new user , follow the steps given below
- Go to User Management -> Users ->Add New

- Fill the user details, select user role, give a unique username.

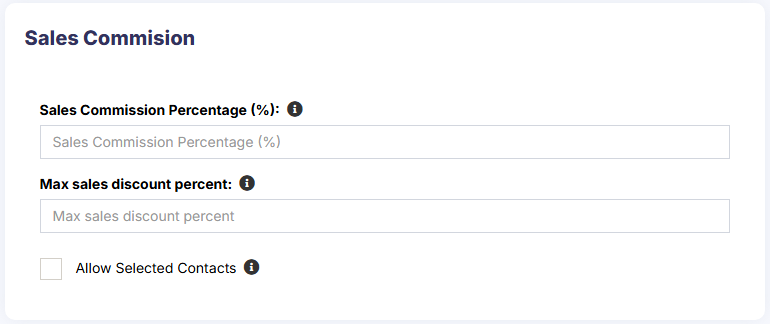
- Sales Commission Percentage (%): Provide the commission % for this user. This option gets applied if the commission agent feature is enabled. (Not available in Senangurus-Enterprise)

- Is active?: Activate/Deactivate the user.

- You can Edit/Delete a user.

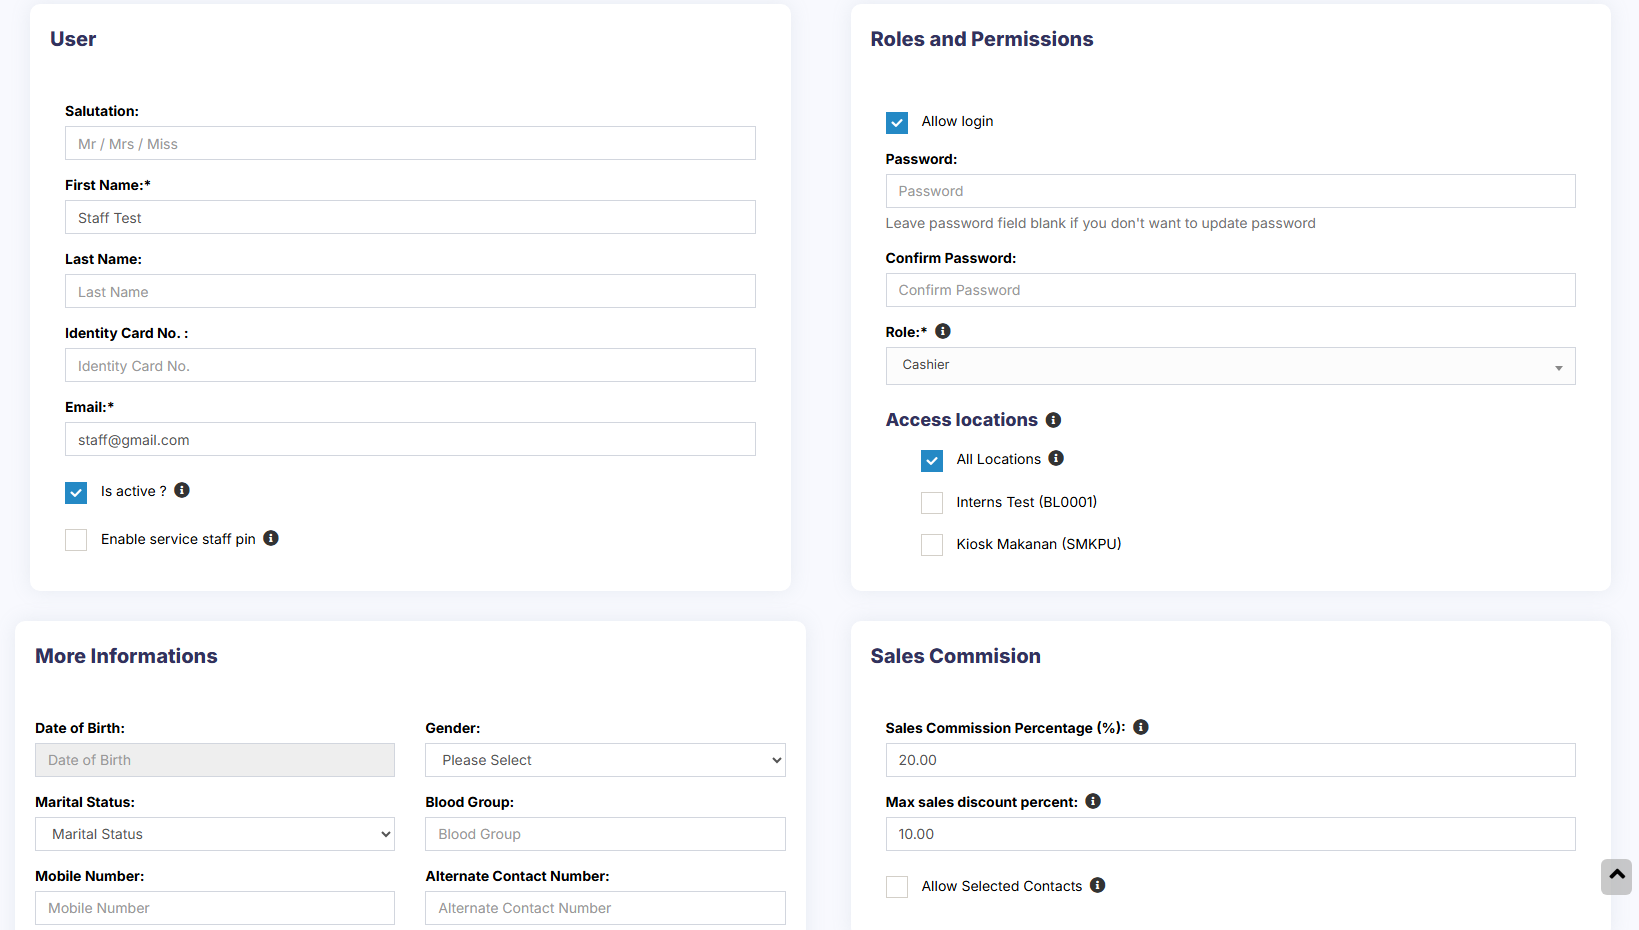


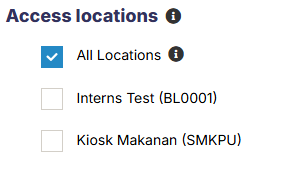
Assign locations
While adding the user, select the locations that the user can access. You can either select all locations or select one or more particular locations.
Refer to the image below:
Max sales discount

The maximum discount that an user can give during sales in the POS & sales screen. If you don’t want to have this restriction then simply keep this value blank.
Disable login
You can provide login permission for an user or deny it. If you allow user to login, then you have to provide the username and password for that user.
Refer to the image below

Video Demonstration:
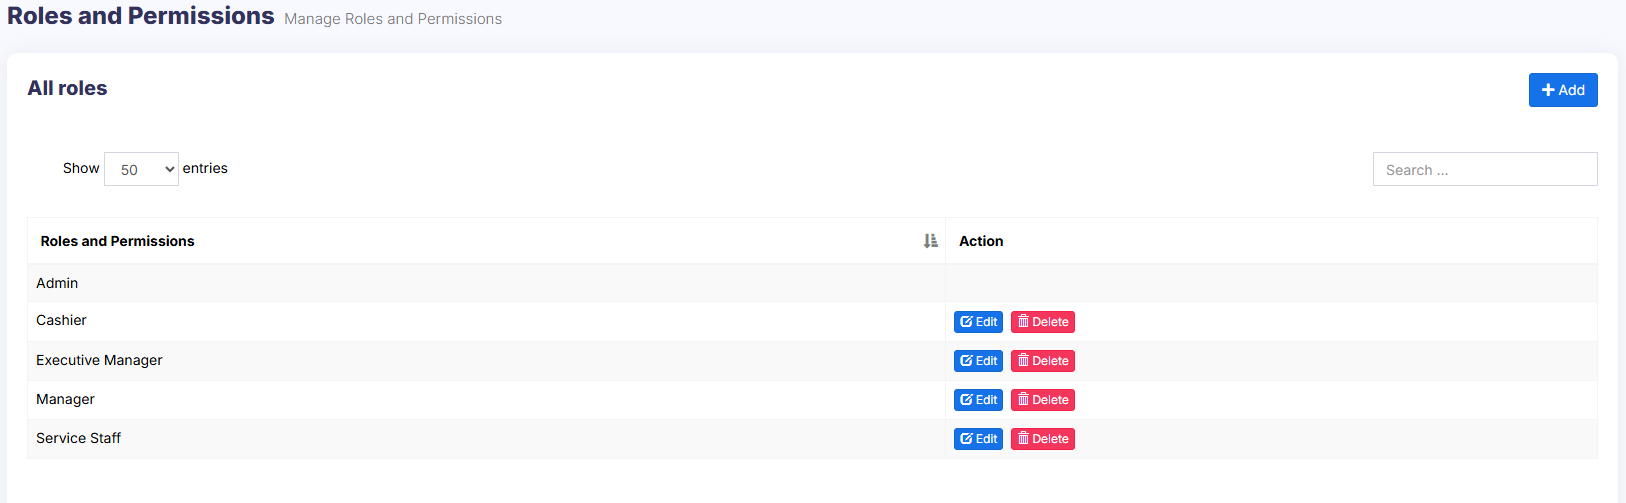
Role Management
Adding Roles
- Every new business comes with some default roles – Admin & Cashier.

Admin have all permissions in the application.
Cashier have permission to only POS section. - You can create a role by clicking on Add button -> Giving a Role Name and then selecting the appropriate permission for that role.

- Sometime you may need to give a user access to a/some particular location(s) only. In this case, select the locations from Access locations permission. Select All Locations to give permission to access all locations for your business.

- Roles permissions can be Edited & Deleted.


You must update the role of an existing user before deleting a role.
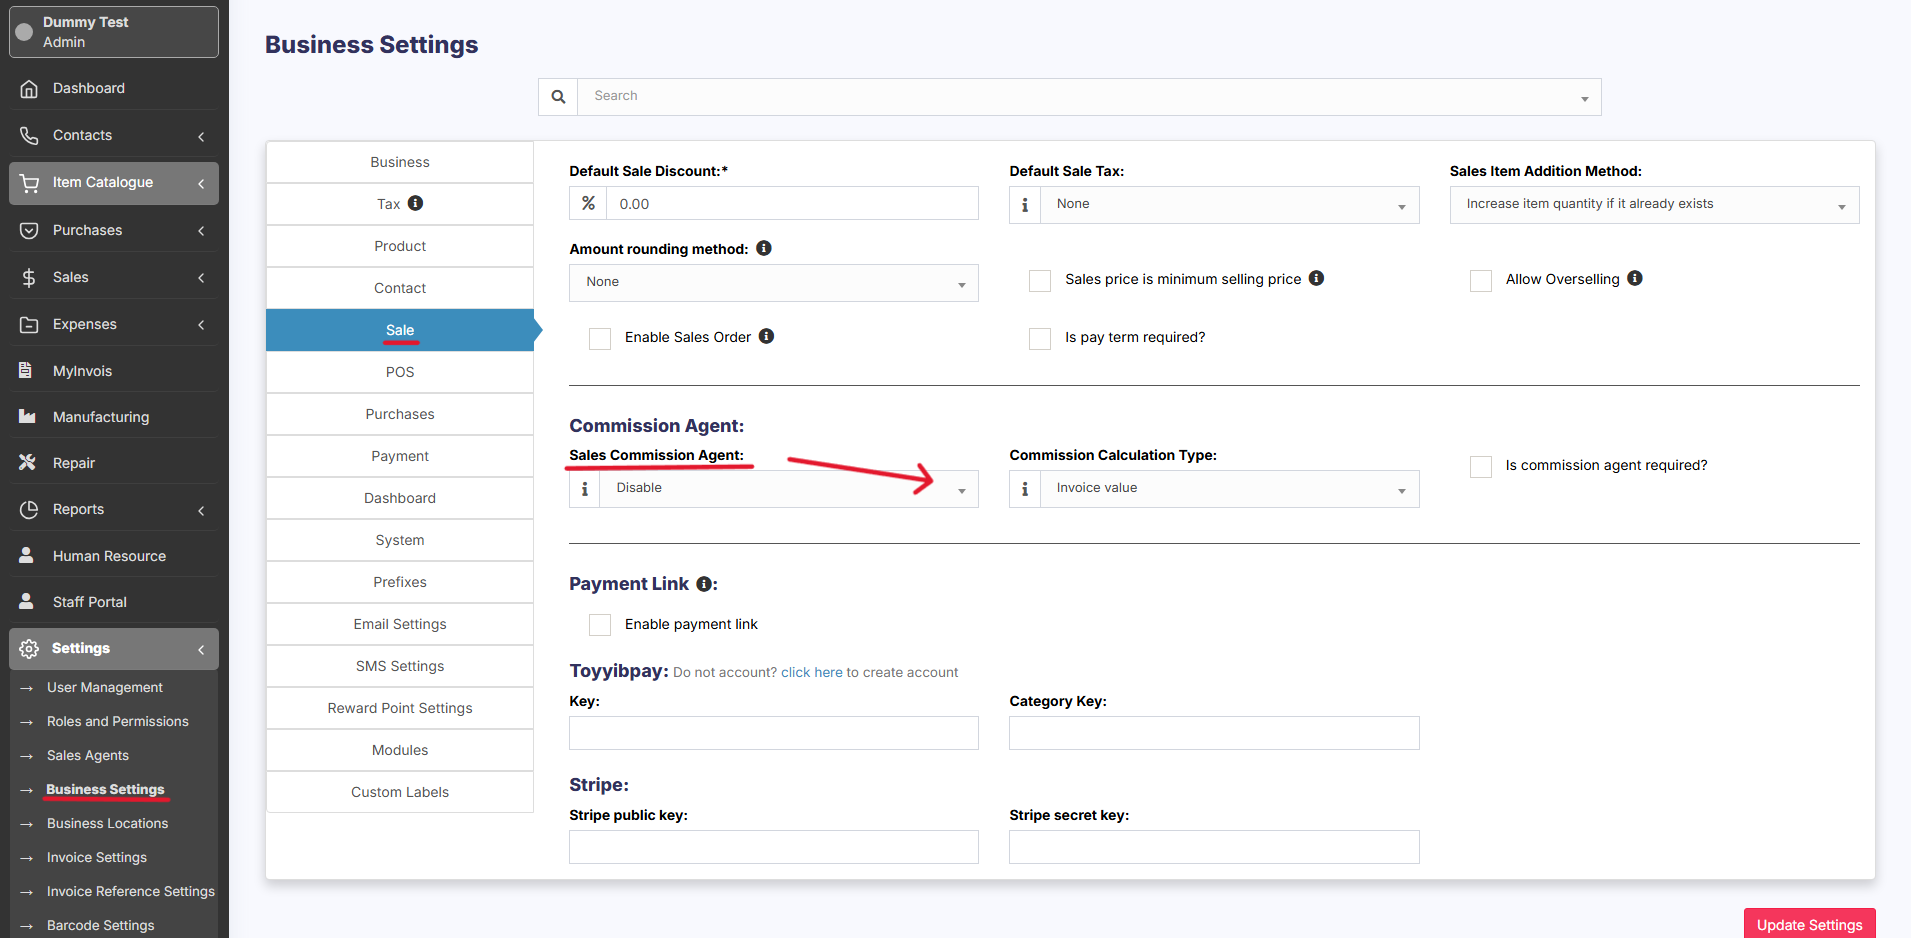
Using Commission Agent feature
Commission Agent is useful for many businesses. Businesses pay sales agent/commission agent commission on every sale they bring.
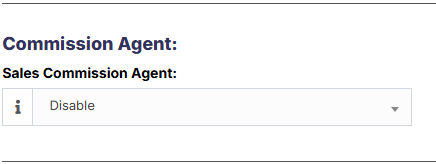
Enabling & Choosing Commission Agent Type:
By default Commission Agent is Disabled. You can enable it from Settings -> Business Settings -> Sale -> Sales Commission Agent drop-down.
You will see 3 different types: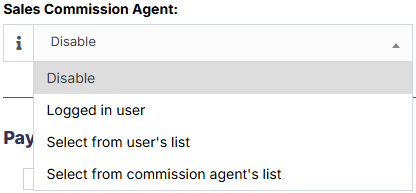
- Logged in User: If this option is used then the Logged in User will be automatically considered as the commission agent for the sales added by him. Meaning the user adding the sales will get the commission for the sales.
- Select from User’s List: If this option is enabled then in POS & Sales Screen you will see the list of “users” present in your business. The user adding the sales will select the commission agent from the list of users displayed.
- Select from Commission Agent List: If this option is enabled then in POS & Sales Screen you will see the list of “Sales Commission Agents” present in your business. The user adding the sales will select the commission agent from the list of “Sales Commission Agents” displayed.
Select the option as per your business requirements.
Adding Commission Percentage:
You can add commission % while adding/editing the User or Sales Commission Agent
Commission Calculation Type:
The commission for a user can be calculated based on two methods
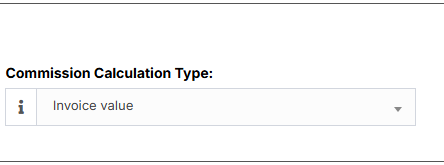
With this method, commissions are calculated based on the total invoice amount generated by the agent.
For instance, if an agent’s monthly invoice amount totals $5000 and the commission percentage is set at 10%, the user will receive $500 as commission.
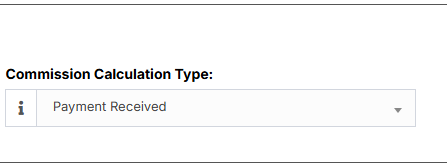
Alternatively, commissions can be calculated based on the actual payments received.
For instance: if the agent’s monthly invoice amount is $5000 with a 10% commission rate, but only $2000 is received within the month, the user will receive $200 as commission. If the remaining $3000 is received in the following month, the user will receive an additional $300 as commission.
Calculating Commission Amount:
To See the commission amount, Go to Reports -> Sales Representative Report.
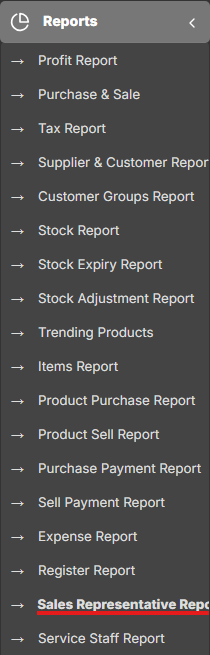
Select the User for which you want to see the commission amount.

On selecting it will show you the detailed summary of Total Sale, Total Sale Commission & Total Expense. Also, the table below lists all the transactions.
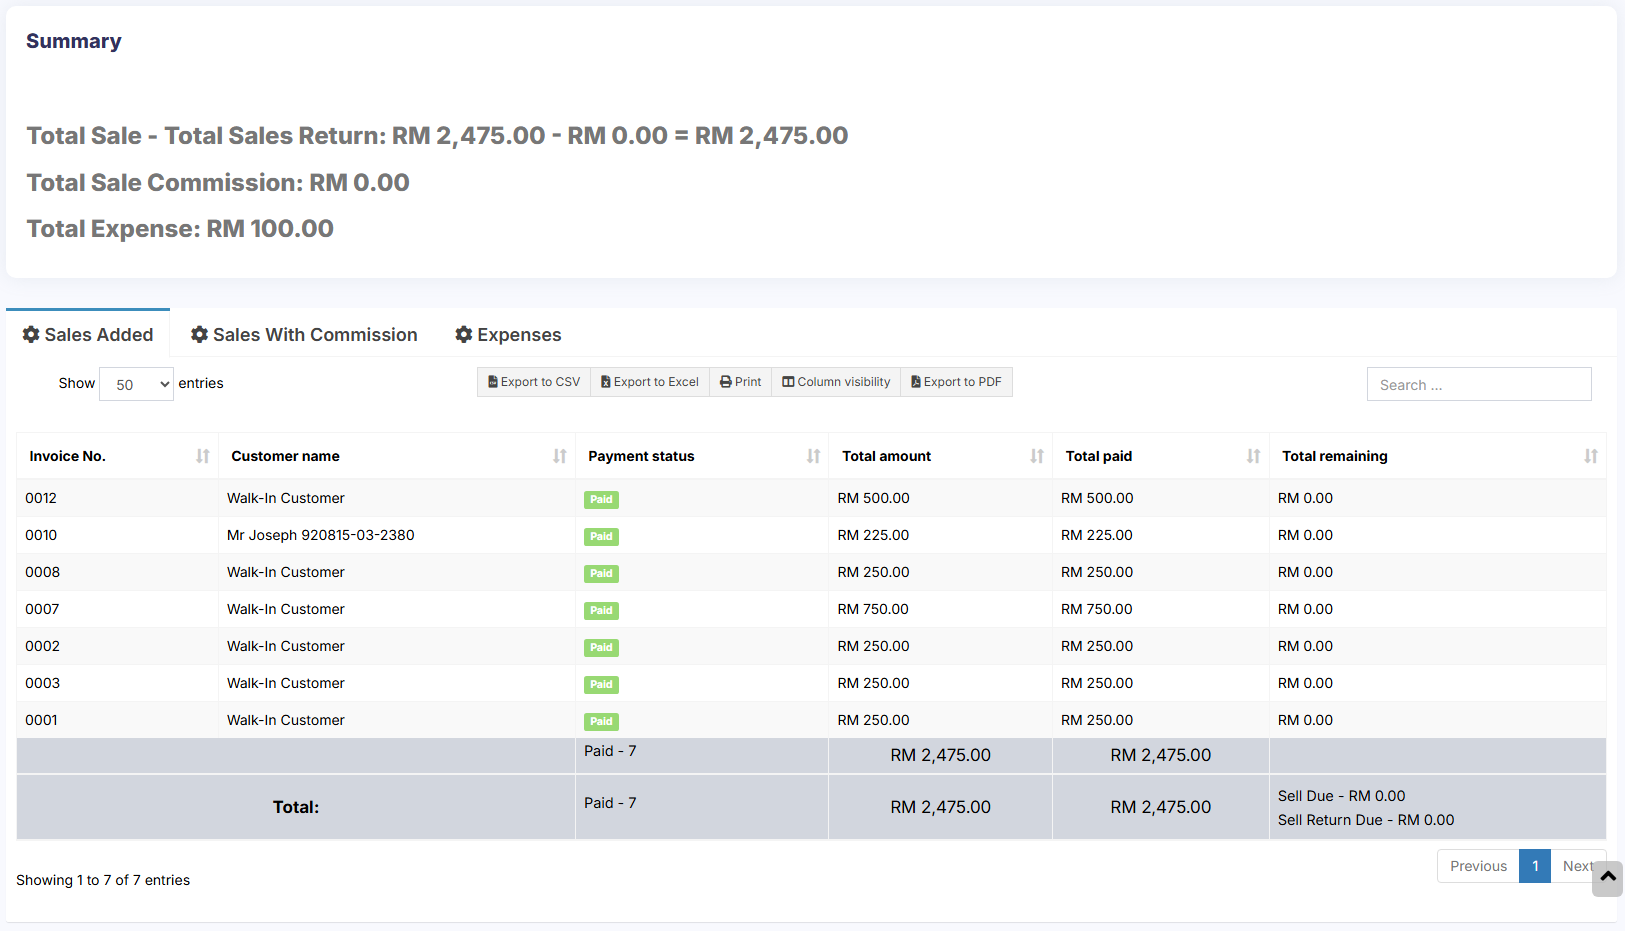
Sales commission is calculated without shipping or tax. Sales commissions are from the sales of the items, not the overhead cost such as taxes, freight, shipping, handling, etc.
Commission payment:
After getting the commission amount, SenangUrus ERP have 2 ways to make payment for the commission.
Using expense
- Calculate the commission from the sales representative report and after paying the amount add it as an expense in Add Expense menu.
- In Add expense, select the Expense-For dropdown
Using HRM module
- Use the HRM module.
- In the HR module, when creating payroll for a user, it will automatically include the sales commission.
- Sales commission will be shown as Payroll-Components so that the business owner and the user both know details of the commission.
Adding superadmin user
Creating Superadmin user:
- Login to the server from Cpanel or DirectAdmin or Plesk or Filezilla (FTP) or similar panels.
- Open .env file with the file editor. .env file is present inside the UltimatePOS directory
- Inside the env file, you will find “ADMINISTRATOR_USERNAMES” configuration. Add the username of the user which you want to make as superadmin.
Example if you want “user1” to be superadmin then add it like below:
ADMINISTRATOR_USERNAMES=”user1″
NOTE: user1 mentioned here is for example only and the username is case sensitive. - You have to add an already existing/signed up username here. To add multiple users as superadmin you can add them comma separated.
ADMINISTRATOR_USERNAMES=”user1,user2,user3″
NOTE: If super admin user is added, that user can
- Access modules tab in side menubar
- Can enable backup – To enable backup using superadmin user