Notifications
- Notifications Settings [Email & SMS configuration]
- Setting up Email/SMTP for Forgot password & other email notifications
- Enable or Disable Auto Sending of notifications
- Browser/Desktop notification using pusher
- Email Notification Settings
- Internal System Notification
Notifications Settings [Email & SMS configuration]
Setting Notification SMS
To Send SMS notifications you need to setup SMS configuration details.
Go to -> Business Settings -> SMS settings
from here we can set up SMS for most of the vendors having support for REST API, most of the support it. If not then check with your provider
Go to the REST API documentation of your vendor. Contact your vendor if you can’t find it.
Here you’ll find 3 different service type: Nexmo, Twilio, and others.
Setting up SMS for NEXMO
- Create a new account in nexmo.
- From your nexmo dashboard, go to account settings, here you’ll find the API key and secret, the From field enter the from the number provided by nexmo. Enter these details in the pos and try sending a test message.
Setting up SMS for twilio
- Go to Twilio & login with your account.
- Get the SID, Access token, and From information. On your project Twilio Dashboard, you can find the Account SID and Auth Token
- Save it and try sending a message
Setting up SMS for others
Let the api structure is
http://your-sms-website.com/api/sendmsg.php?user=&pass=&sender=&phone=&text=
So the configuration will be as follows
URL: https://rest.nexmo.com/sms/json
Send to parameter name: phone
Message parameter name: text
Request Method: GET
Parameter 1 key: user Parameter 1 value:
Parameter 2 key: pass Parameter 2 value: Parameter 3 key: sender Parameter 3 value:
Example Four: Setting up SMS for others
Let the api structure is
$api_url = “http://sms-pos.testsms.com/app/smsapi/index.php?username=&password=&campaign=XXXXXX&routeid=XXXXXX&type=text&contacts=97656XXXXX,98012XXXXX&senderid=XXXXXX&msg=Hello+People%2C+have+a+great+day”;
So the configuration will be as follows
URL: http://sms-pos.testsms.com/app/smsapi/index.php
Send to parameter name: contacts
Message parameter name: msg
Request Method: GET
Parameter 1 key: username Parameter 1 value:
Parameter 2 key: password Parameter 2 value:
Parameter 3 key: campaign Parameter 3 value: XXXXXX
Parameter 4 key: routeid Parameter 4 value: XXXXXX
Parameter 5 key: type Parameter 5 value: text
Parameter 6 key: senderid Parameter 6 value: XXXXXX
Setting headers:
If required in your api, you can also set headers
Header 1 key: Header 1 value:
Header 2 key: Header 2 value:
Header 3 key: Header 3 value:
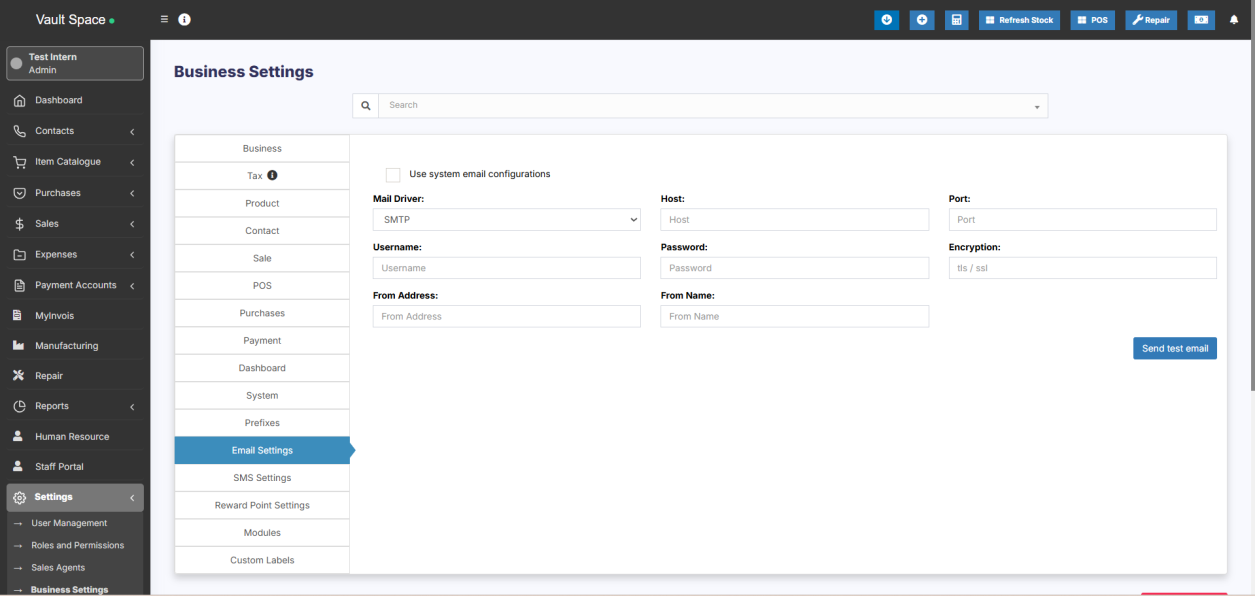
Setting Notification Email
Go to Settings -> Business Settings -> Email settings
Add all the Email SMTP configuration details & it will work.
Business-level mail setup
For sending mail notifications, the business-level mail setup should be done.
For this provide the required details in Settings -> Business Settings -> Email settings
Application-level mail setup
For the purpose of receiving forgot password reset link, the application-level mail setup is to be done on .env file.
Refer this – Document Link
FAQ:
1. Is it possible to send SMS when installing in localhost?
Yes it is possible to send SMS from localhost with an internet connection
1. Whether SMS feature work without adding country codes to mobile numbers?
Some APIs will work without adding country code and some may not. It is based on your API provider.
Setting up Email/SMTP for Forgot password & other email notifications
Email functionality is used in some parts of applications like “Forgot Password”, “Offline Payment approval for SaaS module” and others from time-to-time.
During installation steps, you can set up email setting with all “SMTP” details or if you’re server support php-mail then you can use that too (php-mail is not recommended)
But if you have not set up it correctly then you can follow the below steps to do it:
- Open you .env file
- You will find the below configurations present there
- MAIL_DRIVER=smtp
MAIL_HOST=
MAIL_PORT=
MAIL_USERNAME=
MAIL_PASSWORD=
MAIL_ENCRYPTION=
- MAIL_DRIVER=smtp
- Fill in the appropriate details, you can get in contact with your hosting provider for any of the values above.
- For example with Gmail it looks like below:
- MAIL_DRIVER=smtp
MAIL_HOST=smtp.gmail.com
MAIL_PORT=587
MAIL_USERNAME=
MAIL_PASSWORD=
MAIL_ENCRYPTION=TLS - Some hosting disable port 587 and due to that email may not work, contact your hosting provider & they will enable it.
- MAIL_DRIVER=smtp
- NOTE: Use either TLS or SSL, don’t type both. Also, provide the port according to the given encryption used.
Gmail SMTP:
If you’re using Gmail or GSuite it might throw some errors, check below for a solution:
- If you have 2-factor authentication enabled (almost all have this enabled) then create an app password for pos.
- More details here https://support.google.com/accounts/answer/185833?hl=en
- Create app password from here: https://myaccount.google.com/apppasswords
- Change port & encryption: Try using port 465 and encryption SSL
Enable or Disable Auto Sending of notifications
Enabling auto-sending of SMS & Email to customer on New Sales:
- First, setup the Email SMTP and/or SMS details in Business settings.
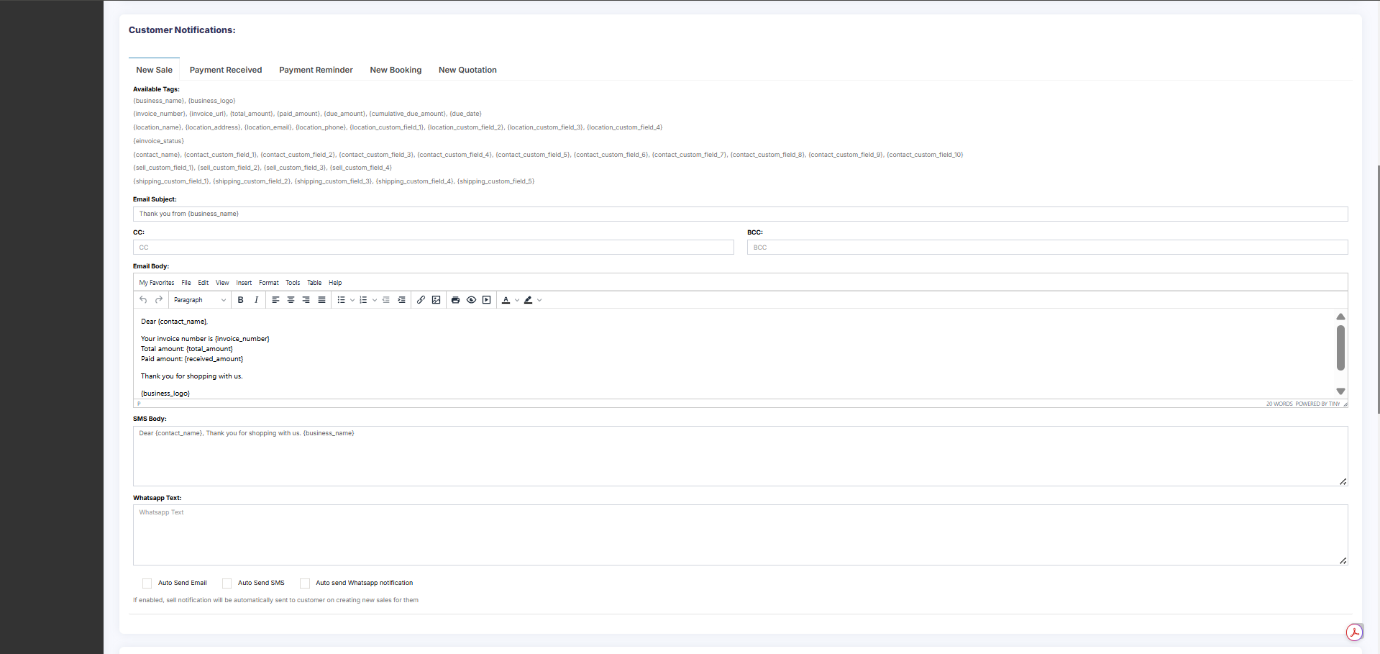
- Go to Notification Template
- Under Customer Notification you will see New Sales notification.
- There you will find the option to enable &
- Now when ever you make a sales a Email or SMS notification will be send to customer.
If there is any error in Email or SMS configuration then sales will not get submitted, so test it properly.
Email notification will only get send in case the customer have a valid email present
Similarly SMS will only get send if the mobile number is present.
Enabling auto-sending of Whatsapp Notification on New Sale:
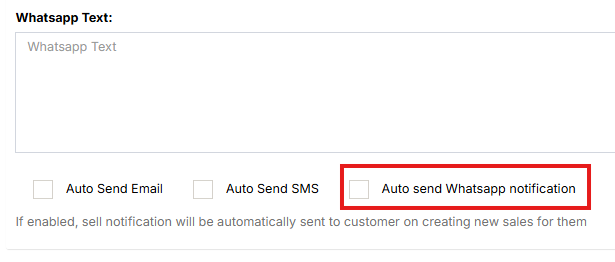
To enable automatic WhatsApp notifications, enable the ‘Auto send Whatsapp Notification‘ check box under Customer Notification > New Sale.
Browser/Desktop notification using pusher
Browser notification helps the user to get notified of any notification quickly.
Requirement:
Your POS must use https or must have an SSL certificate installed.
Steps to enable it:
Setup pusher:
-
- Signup for a pusher account here https://pusher.com/
- Login to your pusher account.
- Click on “Create new app”
- Enter the details:
Name your app,
Select a cluster,
What’s your front-end tech? will be jQuery
What’s your back-end tech? will be Laravel.
Click on “Create my app” and after that, you will find the pusher details as given in the screenshot below\
Setup in SenangUrus Business:
- If you’re using the SaaS-Superadmin module then go to
Superadmin Settings -> Pusher Settings -> Enter the details:
PUSHER APP ID, PUSHER APP KEY, PUSHER APP SECRET, PUSHER APP CLUSTER and save it. - If not using SaaS-Superadmin, then login to cpanel/directadmin or FileZilla, open the .env file present in the pos code for editing. Then you will find the pusher related configuration. Enter the below configuration:
BROADCAST_DRIVER=pusher
PUSHER_APP_ID=<your pusher app id>
PUSHER_APP_KEY=<your pusher app key>
PUSHER_APP_SECRET= <your pusher app secret>
PUSHER_APP_CLUSTER=<your pusher app cluster>Save the file and the notification will work.
Pusher notifications will not support on IOS devices. You need to disable pusher notifications in IOS for SenangUrus Business.
Email Notification Settings
Email Setup in Business Settings:
Emails to customers/suppliers and users can be sent through UltimatePOS for various purposes.
For example, Sale/Purchase Email Notification, Recurring Invoice Notifications etc
In order to send these notifications, the email details are to be set up in Business Settings.
Steps for Setting Mail Details
Follow the steps below to add this
Step 1: Go to Settings > Business Settings > Email Settings.
Step 2: Add the required details
- MAIL_DRIVER=smtp
MAIL_HOST=
MAIL_PORT=
MAIL_USERNAME=
MAIL_PASSWORD=
MAIL_ENCRYPTION=
You can get in contact with your hosting provider for any of the values above.
For example with Gmail it looks like below:
- MAIL_DRIVER=smtp
MAIL_HOST=smtp.gmail.com
MAIL_PORT=587
MAIL_USERNAME=
MAIL_PASSWORD=
MAIL_ENCRYPTION=TLS
Some hosting disable port 587 and due to that email may not work, contact your hosting provider & they will enable it.
Use either TLS or SSL, don’t type both. Also, provide the port according to the given encryption used.
Step 3: After adding all the details, click the test SMS button to check if the configuration is correct.
If it gives some error, you can fix it accordingly.
If you are using GMAIL SMTP check the procedure mentioned in this document – Gmail-SMTP_Document
Internal System Notification
SenangUrus Business generates notifications internally for certain activities.
The notification icon is present on the home screen, which when clicked displays the notifications in a pop-up window.
Following is the list of activities for which notifications are generated in SenangUrus Business
1.Recurring Expense Notification
- Whenever a recurring expense is generated at a specific time, it is notified.
2. Recurring Invoice Notification
- Whenever a recurring invoice is generated at a specific time, it is notified.
Module Notifications
1. Asset Assigned For Maintenance (Asset Management Module)
- Whenever an asset is assigned for maintenance and allocated to a particular user, the user will be notified.
2. Asset Maintenance – Status Changes (Asset Management Module)
- Whenever the user changes the status of the asset allocated for maintenance, the user will be notified about it.
- Whenever a document is shared with other users or updated, the other user will be notified about it.
4. New Leave Notification (HRM Module)
- Whenever a user applies for a leave, the admin is notified about it.
5. Leave Status Notification (HRM Module)
- Whenever the admin approves or cancels a leave, the user is notified about it.
6. Payroll Notification (Essentials Module)
- Whenever a payroll is added for an user, the user will be notified about it.
- NOTE: To generate this notification, the “Send Notification” check box should be enabled while adding the payroll.
10. Spreadsheet Shared Notification (Spreadsheet Module)
- Whenever a spreadsheet is shared with some user, the user will be notified about it.
11. Send Subscription Expiry Alert (Superadmin Module)
- Whenever the subscription expires, a notification is sent to the user regarding it.
- NOTE: The days before which the notification is to be sent before the subscription expires can be mentioned in settings.
12. Superadmin Communicator (Superadmin Module)
- Whenever a message is sent by superadmin to businesses, the business admin will receive a notification.
13. Sync Orders Notification (Woocommerce Module)
- Whenever all orders are synced from the Woocommerce App to POS notification is received in POS.